Author Topic: Another M42 engine build  (Read 67053 times)

mabeer

  • Full Member
  • ***
  • Thank You
  • -Receive: 8
  • Posts: 124
    • View Profile
Re: Another M42 engine build
« Reply #45 on: November 10, 2013, 09:25:57 AM »
Block is finally back together (all my projects end up taking longer then expected but this engine building is crazy).  Upon initial assembly we found the JE Pistons were made incorrectly and were sticking way out of the block.  A quick call to Steve at TEP and he had it sorted out.  JE was quick to correct their mistake so a big thanks Steve and JE.

Bearing clearance was a little tight so the shop ground the crank slightly.  I'll have to grab some photos of this place,  C&P Machine in Fort Wayne, the cranks they have sitting around are incredible.  Everything from dirt track racers to diesel ships to a 300hp 1930's era air compressors.

They also had to clearance the block for the new rods.  The crank would turn freely but there was a very slight noise indicating rod/block contact so they clearanced that for me as well.  Needless to say that added some unplanned cash to this build but I feel much better knowing things are right.

Is there a consensus on what to use when putting timing case back on? dry, shellac, anaerobic sealer?  I'm thinking Indian Head on the timing case to block and the anaerobic sealer on the covers to the case.

wazzu70

  • Nasty Nick
  • Hero Member
  • *****
  • Thank You
  • -Receive: 18
  • Posts: 671
    • View Profile
Re: Another M42 engine build
« Reply #46 on: November 11, 2013, 12:46:16 AM »
I just assembled mine dry (block to timing case), but I think the Indian Head (Shellac) is probably a great idea.

I had to take the upper timing cover off a while ago and used anaerobic sealant to re attach it since I didn't have a gasket. I didn't have any issues.

No problems going slow. Doing it right the first time saves headaches later on!!!
-Nick
91 E30 M42 with VEMS

bmwman91

  • Administrator
  • Legendary
  • *****
  • Thank You
  • -Receive: 33
  • Posts: 2798
    • View Profile
    • http://www.e30tuner.com/
Re: Another M42 engine build
« Reply #47 on: November 11, 2013, 12:26:15 PM »
For the timing case to the block, I have always used the dry paper gasket or the paper gasket with some of the Permatex non-curing aerosol gasket sealer (the sticky red stuff). I'd only use a spray type of sealer for that particular one since you definitely want a uniform, THIN coating. For the TC, you definitely don't want to plug up the small oil groove that feeds the chain tensioner / sprayer, or risk having RTV get into the main oil galley. And of course, thick sealer applications increase the chances of breaking the casting during installation. I have also used the same spray stuff for the thermostat housing gasket since I don't want the bleed groove getting clogged up.

For the TC covers, I'd either use the M44's coated metal gaskets, or skip them & use some Permatex Ultra Grey RTV. Thinly coat both mating surfaces, finger-tighten the bolts, let it cure for the recommended time and then fully tighten the bolts. Whichever sealant you use, just maker sure that it is rated for high temp use with oil & coolant and you'll be fine.

06/05/2011 - 212,354 miles
Visit HERE for a plethora of 318iS stuff and some other randomness.  Would you say I have a, plethora, of pinatas?

mabeer

  • Full Member
  • ***
  • Thank You
  • -Receive: 8
  • Posts: 124
    • View Profile
Re: Another M42 engine build
« Reply #48 on: November 17, 2013, 08:40:50 PM »
Well I suppose the good news is when I heard the snap it wasn't the cam.


I was installing the cam per Wayne's instructions.  I didn't notice that as the cam was being pulled down so was my Magilla Gorilla giant Crescent wrench head I was using to hold the sweet spot.  Why didn't I use my small one? :-(

Anyone have a cam tray they want to get rid of or any suggestions?  Leave it? JB Weld?

It's the exhaust side.
« Last Edit: November 17, 2013, 08:53:17 PM by mabeer »

keflaman

  • Administrator
  • Hero Member
  • *****
  • Thank You
  • -Receive: 35
  • Posts: 929
    • View Profile

wazzu70

  • Nasty Nick
  • Hero Member
  • *****
  • Thank You
  • -Receive: 18
  • Posts: 671
    • View Profile
Re: Another M42 engine build
« Reply #50 on: November 18, 2013, 11:59:12 AM »
I would probably just leave it actually. The tray isn't doing a whole lot in that area.

Why aren't you holding the cams by the square section in the back?
-Nick
91 E30 M42 with VEMS

mabeer

  • Full Member
  • ***
  • Thank You
  • -Receive: 8
  • Posts: 124
    • View Profile
Re: Another M42 engine build
« Reply #51 on: November 18, 2013, 01:39:51 PM »
Yep, you're right.  After I got it turned to the "sweet spot" I should have held it at the back. 


wazzu70

  • Nasty Nick
  • Hero Member
  • *****
  • Thank You
  • -Receive: 18
  • Posts: 671
    • View Profile
Re: Another M42 engine build
« Reply #52 on: November 18, 2013, 06:14:44 PM »
Hey, you learn from making mistakes. I know a lot about working on engines from past goof ups!
-Nick
91 E30 M42 with VEMS

mabeer

  • Full Member
  • ***
  • Thank You
  • -Receive: 8
  • Posts: 124
    • View Profile
Re: Another M42 engine build
« Reply #53 on: November 19, 2013, 10:35:32 AM »
I guess this is why you check.  My assumption is if you can see the piston through the clay there's not enough clearance.  A quick word on clay, which probably everyone besides me already knows, get the stuff called plastisina. I did this twice because the first "modeling" clay I used was some kids stuff which had a bit of memory to it so it wouldn't hold the indentation well enough.  Plastisina is the ticket.


wazzu70

  • Nasty Nick
  • Hero Member
  • *****
  • Thank You
  • -Receive: 18
  • Posts: 671
    • View Profile
Re: Another M42 engine build
« Reply #54 on: November 19, 2013, 05:19:05 PM »
I didn't know you had to use a specific clay/putty. In the past I had used Play-Doh, but it was just to verify I had plenty of clearance. It was never in a situation where I thought clearance would be tight!

Do you have oversize valves or are the valve pockets too small (or both).
-Nick
91 E30 M42 with VEMS

mabeer

  • Full Member
  • ***
  • Thank You
  • -Receive: 8
  • Posts: 124
    • View Profile
Re: Another M42 engine build
« Reply #55 on: November 19, 2013, 05:48:05 PM »
No valves are not oversize.  My understanding is Korman left the pockets stock on the exhaust side.  Their thought was you need the material there for heat transfer and you can run into trouble if you pocket the exhaust side.    Since I was so tight on exhaust I checked intake and had like 170 thousandths clearance!  Now, the piston valve reliefs are bigger but so are the valves.  When I started tearing things down  I went to turn the crank back 90 degrees to get the pistons to all drop but stopped before doing so.  I think I did the same thing on the exhaust side but didn't catch it and rotated the crank CCW 90 while still attached to the chain & cams.  I don't recall for sure.

I'm going to retest it tomorrow, I am betting rotating the crank and cam backwards messed up the clearances.

djmossm42

  • Newbie
  • *
  • Thank You
  • -Receive: 0
  • Posts: 14
    • View Profile
Re: Another M42 engine build
« Reply #56 on: November 20, 2013, 09:16:43 AM »
Regarding the cam trays, anyone familiar with this mod?

https://www.youtube.com/watch?v=ynVBlDMow3k&feature=youtube_gdata_player

wazzu70

  • Nasty Nick
  • Hero Member
  • *****
  • Thank You
  • -Receive: 18
  • Posts: 671
    • View Profile
Re: Another M42 engine build
« Reply #57 on: November 20, 2013, 01:28:59 PM »
Yeah, the cam and crank need to move together to properly check the clearances. Makes it a PITA since you have to assemble things then disassemble things.

Also, was an old headgasket used between the head and block? That will change the clearances as well.
-Nick
91 E30 M42 with VEMS

Warsteiner

  • Hero Member
  • *****
  • Thank You
  • -Receive: 21
  • Posts: 576
    • View Profile
Re: Another M42 engine build
« Reply #58 on: November 20, 2013, 02:43:21 PM »
Regarding the cam trays, anyone familiar with this mod?

https://www.youtube.com/watch?v=ynVBlDMow3k&feature=youtube_gdata_player

What would you like to know about this mod? I did it about 5-6 years ago.

Maybe you can start a new topic for this so we don't get off track with mabeer's build?

Cheers,
~Ralph

mabeer

  • Full Member
  • ***
  • Thank You
  • -Receive: 8
  • Posts: 124
    • View Profile
Re: Another M42 engine build
« Reply #59 on: November 20, 2013, 04:00:34 PM »
Here's the latest -


140 thousandths which is plenty.  I'm going to run down the procedure as it should be (probably other and maybe better ways but this is how I did it) and then I'll highlight my mistake for anyone that stumbles across this thread in the future.  If anything needs to be added or corrected please feel free to do so.

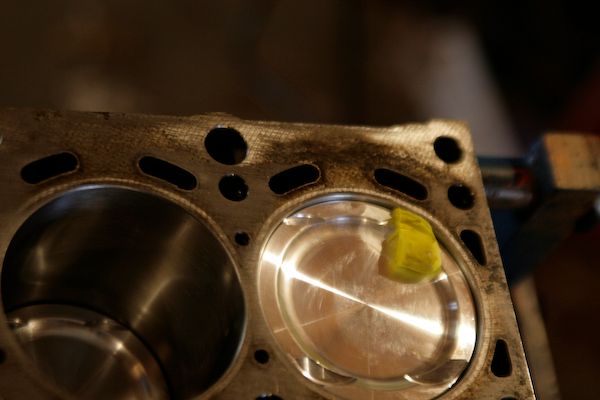
1)  With head off find top dead center make a reference mark on your crank.  Pistons in cylinders #1 & #4 will be up, #2 & #3 down.
2)  Put your clay over valve relief you're checking.  Make sure your piston top is clean.  You want the clay to stick.  Lightly oil your valve face so it doesn't stick. Valve spring of corresponding valve relief should have a light weight checker spring or lifter should be a solid lifter otherwise hydraulic lifter will be compressed and you'll get an incorrect reading.
3)  Rotate crank CCW 90 degrees and your pistons will drop so all four are at their lowest point this will prevent any inadvertent valve interference when mounting the head.
4) Throw on your old head gasket and mount your head.
5) Set your cams at top dead center.  Front lobes should be facing each other and pointed slightly up, flats in rear should be vertical and parallel  on Schrick.  Not sure about Cat-Cams and OEM is square as I recall.
6) Lock your cams in place using your preferred method.
7) Now you can safely turn your crank 90 degrees CW to your reference mark.
8) Install your timing chain, timing sprockets with arrows up, 15 rivets between arrows.
9) Turn your crank CW a few rotations
10) Remove your timing chain.
11) Rotate your crank CCW 90 degrees.
12) Remove your head.
13) Check your clay.

The first time I did this, when I thought I had clearance issues, I reversed steps 10 & 11.  That's a no -no.

So now I wait.  Why?  Because upon closer inspection I found not only had I taken a chunk out of the cam tray but I also cracked it where one of the lifter buckets go.  My BMW parts department couldn't find one in the States so it is coming from Germany.  I've had parts from Germany in as little as a week up to as long as three.  Since I'm waiting I decided to order the timing case from a later euro M42 that replaces the idler wheel with a guide rail.  Not sure if it will with the older block but we'll find out and I'll post results.

I also found out that the Schrick buckets are identical to the VW buckets that are a popular swap for OEM.