Hello again all,
Its been another few months since my last visit.
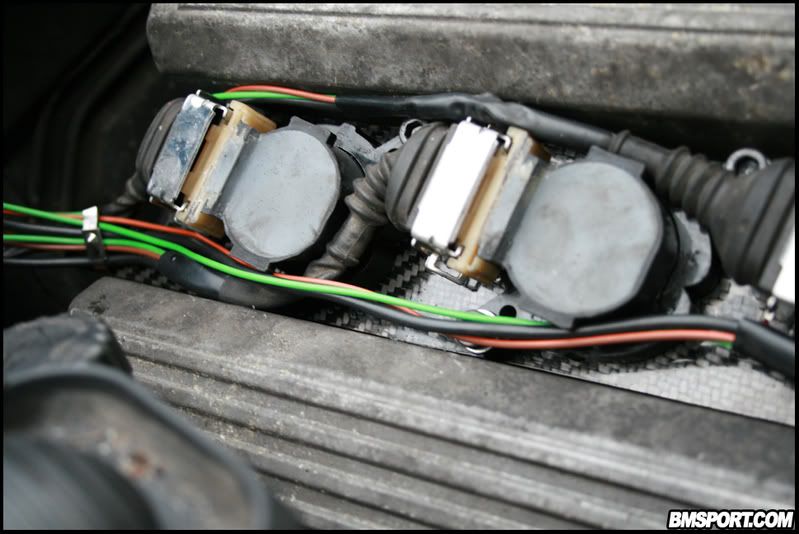
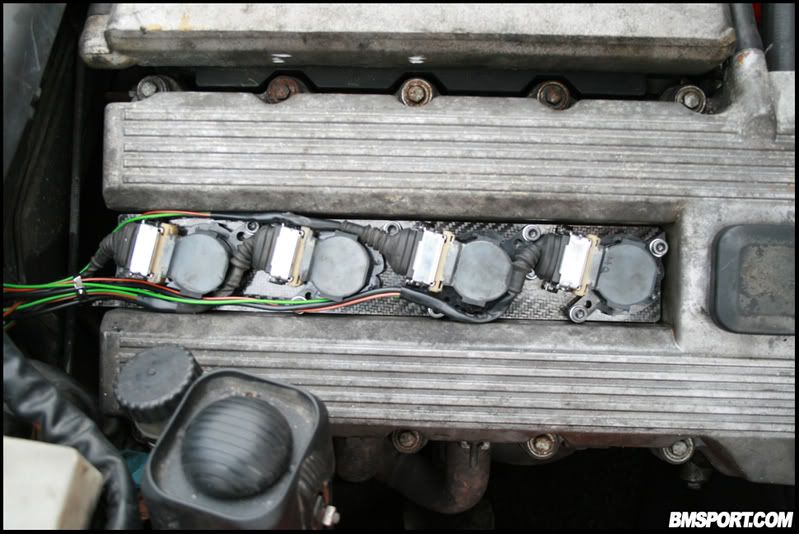
I've been busy with another mod - a Carbon Fibre pre-preg Coil Over Plug rail. It is a direct replacement of rob_E30's rail he provides in his COP Conversion Kit, available
Here.
Well, it was a long process but it's finally done; this has taken me a while to complete as I've found it hard to find the time after work to do it.
I work for Prodrive Motorsport in the composites department here in the UK, and as such have access to pretty much every conceivable pre-preg material, core, resin system and composite process available.
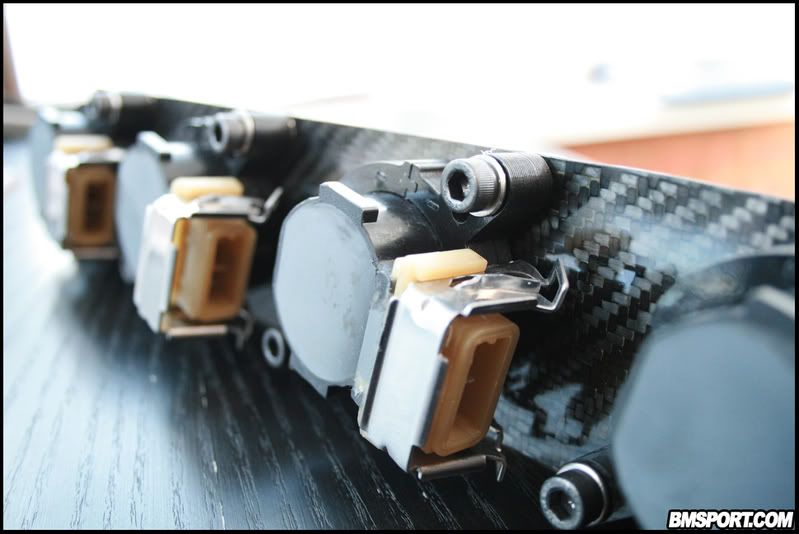
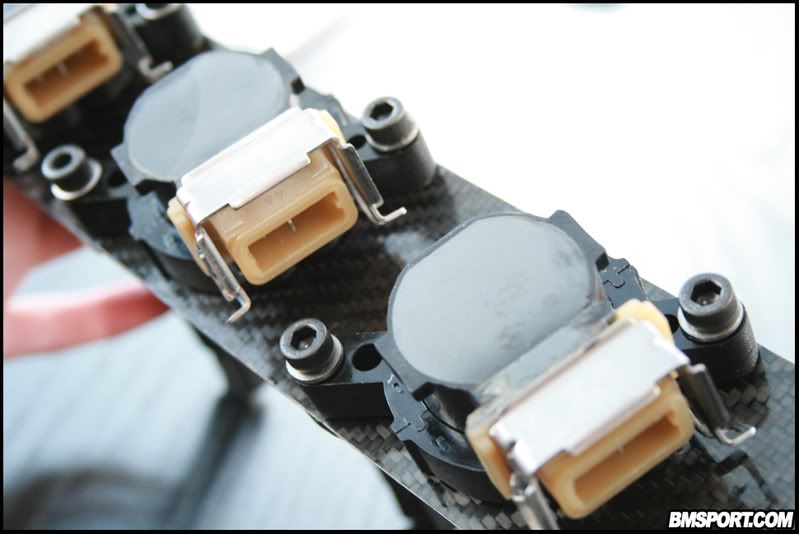
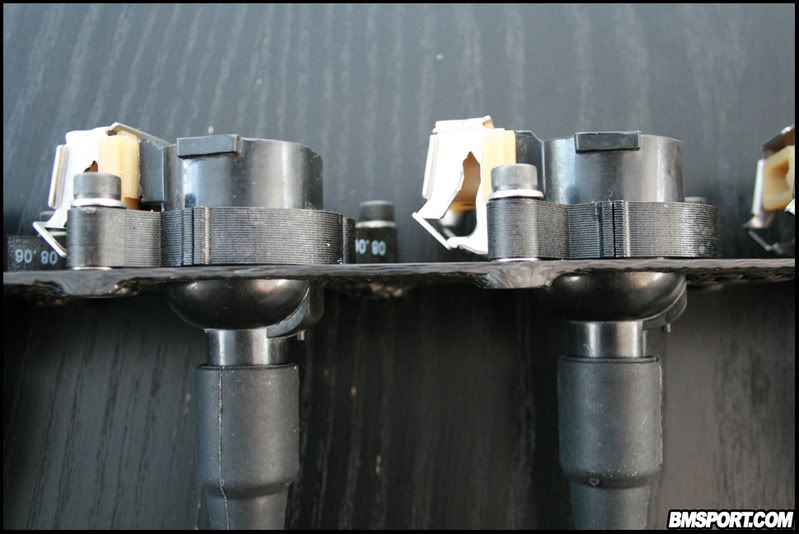
Upon receiving the COP kit from Rob I thought the whole assembly was very well engineered - nice to have everything in one package. A great buy! One thing bugged me though - it was all a little heavy (with all the Coils sat in the rail). Obviously, I wasn't going to crack open the Coil Packs to see what I could rip out...their weight comes from their casing. So I decided to produce the rail out of Carbon Fibre.
Here are the results:
Original rail weight: 240g (0.24kg)
Carbon rail: 90g (0.09Kg)

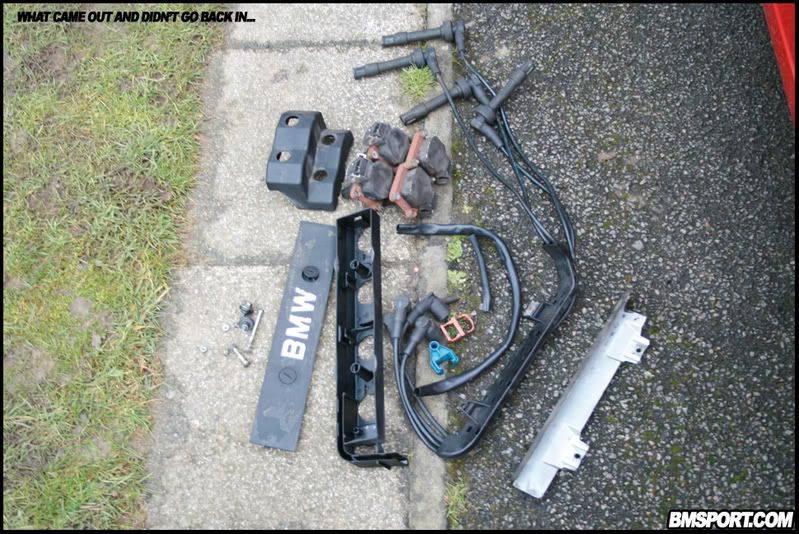
What is now sitting in a box, ready to be junked or sold!:
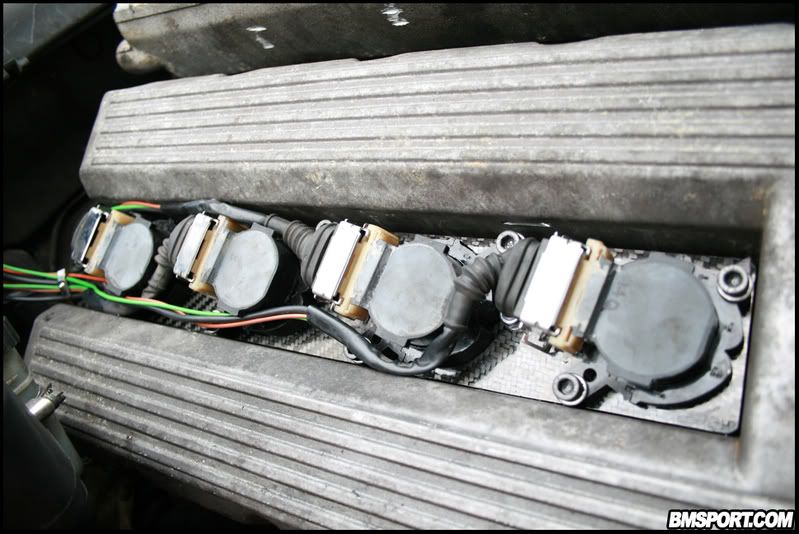
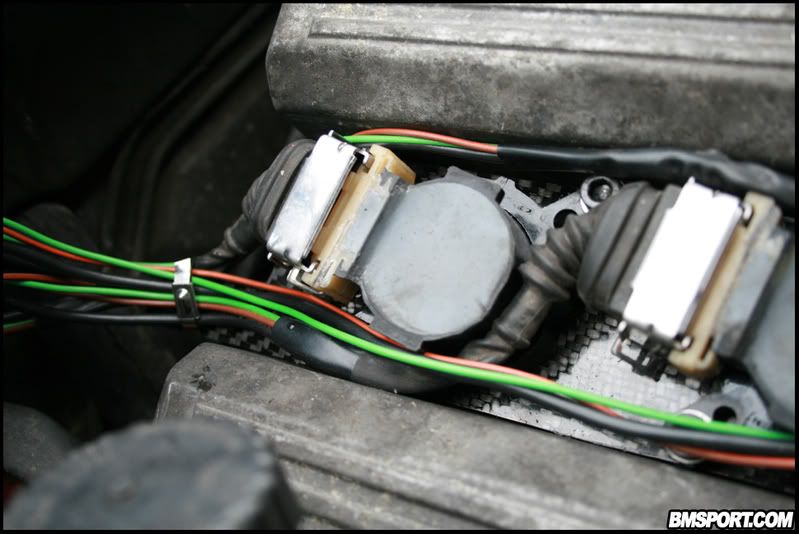
As you can see, I still need to get the ECU wires wrapped in heat-shrink or insulation. I don't like them exposed, though after a long run-about to check temperatures and general running-in (of sorts) I found the Coil Packs to be almost stone cold; as well as the ECU wires. The cylinder head was piping hot as per usual!
The processThe rail itself is a 2nd Generation version. The first one produced was too thin for my liking (I only used 3 plys of pre-preg MTM carbon) and it was almost possible to bend the whole thing into a 'U' shape. It was strong, but I don't leave anything to chance; so I made another one.
My second (and final) attempt uses an alternate, superior material - laid up in 5 plys; each with alternating orientations for added strength. This one I could barely bend at all; let alone into anything resembling a letter from the alphabet...
The material is an LTM (Low Temperature Material. Called 'Low' because of the temp' it goes solid at in the Autoclave). LTM's are typically used when creating moulds (or 'tools', as they're commonly referred to). Hence, this material's nickname: 'Tooling'. It is also used in engine-bay components (such as cam-covers) as the Epoxy resin which impregnates the carbon actually gets harder the higher the temperature it is subjected to. MTM (Medium Temperature Material) is good, but LTM is better suited to higher temp environments.
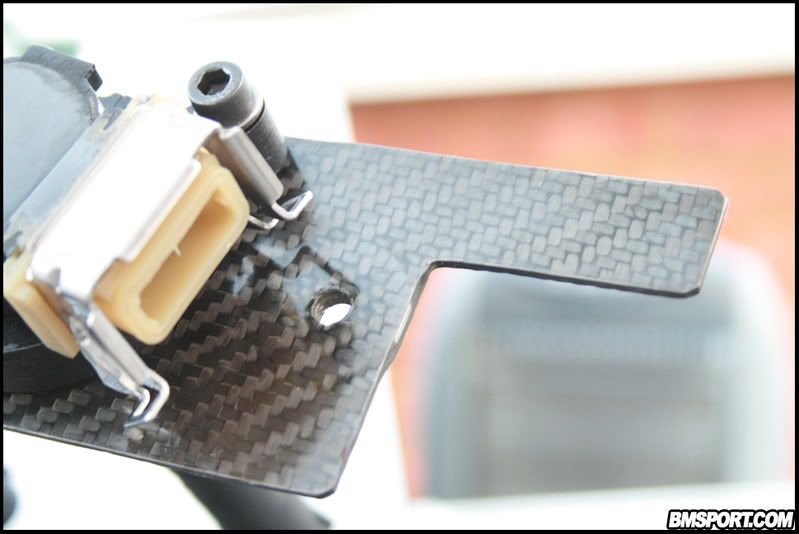
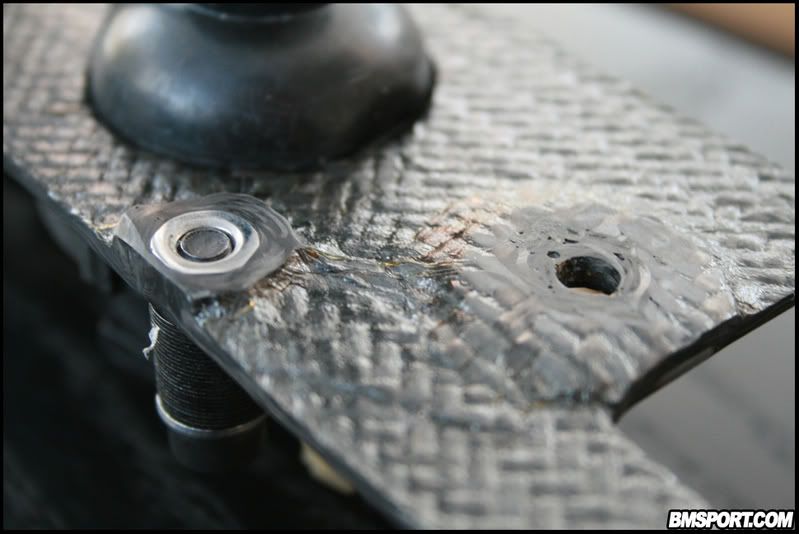
The Coil Packs on Robs ally rail are held on with M6 Allen bolts. Threads can't be easily tapped into Carbon Fibre - the material usually splinters before a decent thread is cut. And even if you were to get a threat cut, the bolt usually rips it clean out if you're too vigorous or harsh. So, I had to lay M6 nuts into the carbon itself and cure the lot together. The result is basically indestructible - unless you don't wrap the nuts in enough carbon...then they'll just rip out (doesn't usually happen; I’m just stating the obvious).
The same was done for the cam-cover mounting points (x2) on the rail. I used large M6 washers to add some reinforcement to the ends which get bolted down. If you look closely at the 1st picture you can make out the outline of a washer inside the carbon layers.
FYI: the 1st carbon rail I made weighs less than the 2nd one I'm using. It comes in at 60g (0.06kg)... 30 grams lighter than my revised design, and a whole quarter of the weight of the original aluminium plate. Shame its just sitting about now!
Aaanyway.....enough of that!
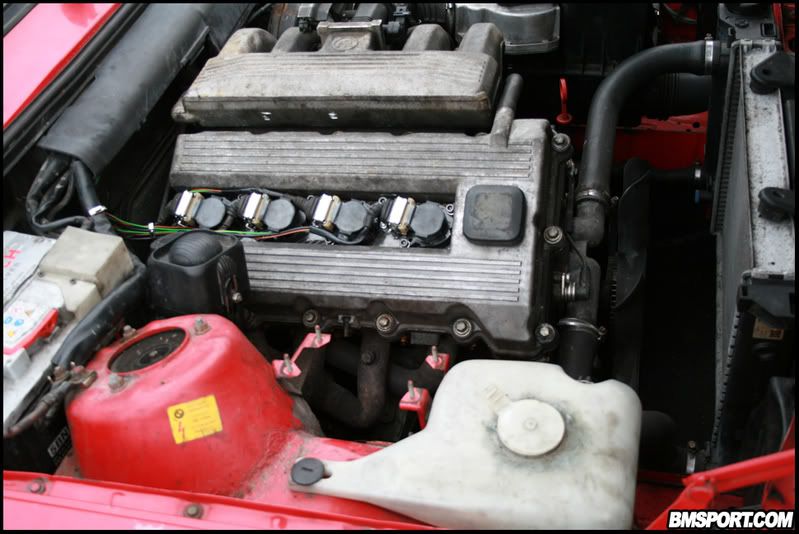
Driving-wise... Z0MG it's like a different car, almost

Soooo much smoother, quicker to return to idle and smoother while idling. Cold start is amazing; hot starting is even better. It pulls muuuuch strongly and confidently in each gear, responsiveness is much improved too and the whole car feels quicker.
For all the time and money put into this - I’m so pleased! For those of you interested in Composites and the processes involved in manufacturing autoclaved Pre-impregnated components, here's what it took to get the finished item (in order of task):
- Flat and polish of original aluminium item (which was used as the mould): 1hr 15min
- Water clean, panel wiping and Seal and Releasing of mould: 1hr 15min
- Abrading of M6 threaded inserts and washers: 10min
- Kit cutting: 5min
- Laminating: 1hr 20min
- Haylar, breather and vacuum bagging process: 20min
- Autoclave curing @ 100degreesC / 90PSI: 1hr 45mins
- De-bagging and Break Out: 15min
- Post cure in oven @ 80degreesC (not normally required, but I used an expensive LTM [Low Temperature Material] which requires a post-cure ) : 2hrs 30mins
- Trimming / sanding @ 1200grit: 2hr 15min
- Machine Polishing with '3M Perfect-it 3' : 15mins
Total time: 11hrs 10minsIf I haven’t bored you already then thanks for reading! If you have any Q's about the work here, or any other composites process then let me know - I'd be happy to help :D
Scott
BMSPORT.COM Topic: Carbon Pre-preg COP kit (Read 4595 times)