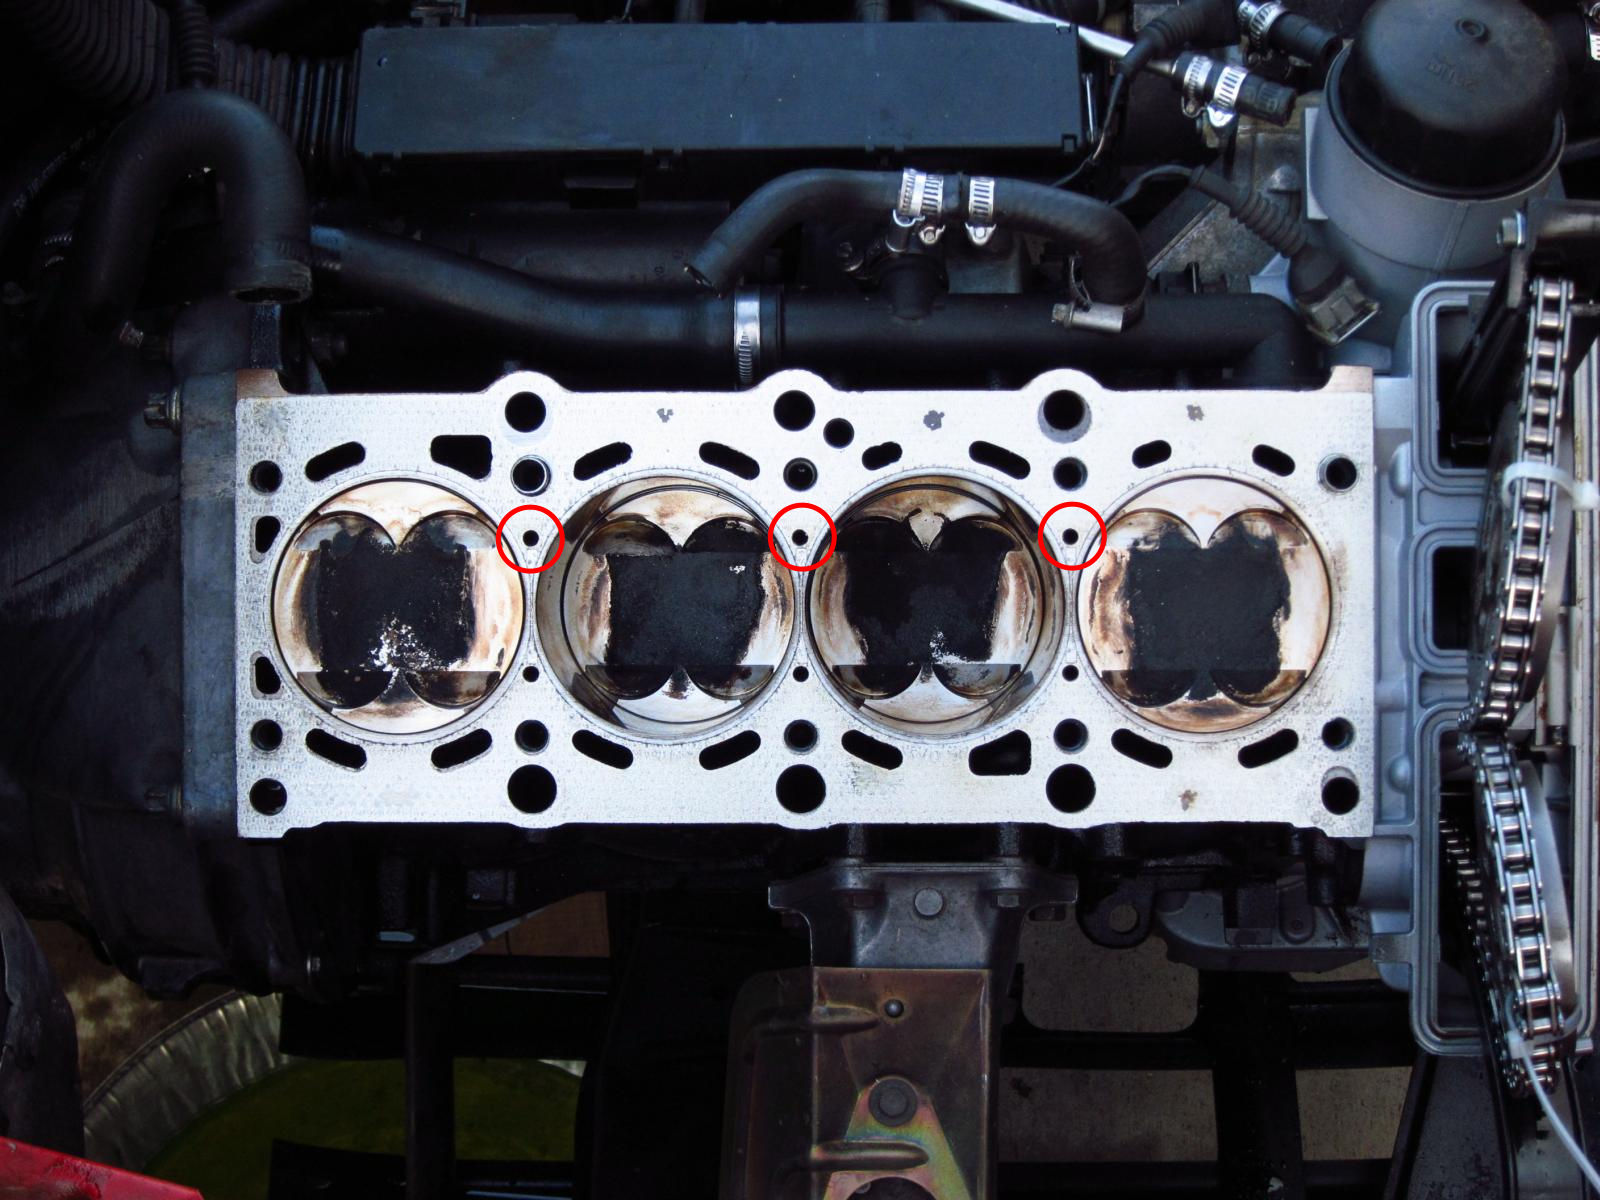
Yeah from looking at the imprints on the block in some pics I took when I pulled the head, the engine had an M44 gasket in there before. I'll circle the 3 small holes that it blocks. I assume that these don't do anything, because if they were oiling holes I think that the valve train would sieze lol.
Here is the M42 gasket:
http://www.ecstuning.com/Search/11121721550/ES18248/Here is the M44 gasket:
http://www.ecstuning.com/Search/11121433951/ES18139/These are the holes that the gasket blocks:

This thread seems as good as any to give some status updates on my project too.
I got it all back together today, mostly. The injectors I received don't seem to fit though. They are later EV6 style ones, and the little slots that the metal clips grab are too far from the fuel rail so the clips can't actually secure them to the rail. Sooooo...looks like I have a phone call to make on Tuesday lol. HOPEFULLY there are some longer clips out there that will do the job. Did M44 engines use different/longer clips?
These are 24# injectors with quad-pintles.


Here are the pistons and block after some cleaning. I used a putty knife and shop-vac to get most of the crud off (the carbon on the pistons came right off) and then some lacquer thinner to deal with what remained. Then, I finished off with a clean rag and some isopropyl alcohol to remove any remaining residue. The putty knife also worked well to de-burr piston #3 which had some slight damage from the broken intake valve.

This is what it looked like before I started.

I was also a little worried about the metal paint stuff on the HG. It looks like MM coats the HG with a metalized paint (the first one had this stuff on it too and I had to scrape it off the block). It seemed to be flaked off in a few places around cylinders 2 and 4 (exposed gold areas). I assume that this is a non-issue, given how thin it is and how much pressure is clamping the head onto it? My paranoia seems to be a little heavy lol. I vacuumed out the head bolt holes, although I was tired and didn't remember to blow them out and check for fluid. I coated all of the bolts with ARP moly lube prior to installation, and they all felt like they torqued down the same so I doubt that any of them were hydro-locked with coolant or anything. I set them all to 25ft-lbs in the specified order (god only knows how accurate that torque wrench is anymore) and then eyeballed the two 90 degree turns. Hopefully it all works out.

I had a familiar mini-project too. When I was reinstalling the top bolt for the driver's side chain guide, the threads stripped. Thankfully, this is really easy to deal with without taking anything apart. Just get a shop vac hose down in there, drill, tap, clean and stuff a helicoil in!

The repaired head. Again, nit-picking. Are the cam bearing caps directional? One seemed to be "upside down" relative to all the others (rearmost exhaust cam cap). I turned the engine over by hand a good 8 times and it felt smooth as butter, so at least the timing is on. MM made some very good, clear TDC marks for the cams so I could get things aligned easily.

When the car WAS running a few months ago, I seemed to be getting a speed related vibration, typically at 75MPH or more. I suspected that maybe I got the driveshaft halves out of phase or something. When I checked, the halves seemed to be in alignment. One of my four wheels seems to be missing a weight, and the tires are old, hard rubber and close to needing replacement, so maybe it is just that.

I DID forget to bias the CSB 5mm toward the front last time, so I took care of that this time.

So anyway, everything is together except the fuel rail and upper intake components. I will add coolant then too. The oil is in (Castrol 10W-60 TWS full synthetic). Jim at MM did a big oil study and concluded that this stuff offers the best protection for any non-race application.
http://www.pelicanparts.com/More_Info/07-51-0-009-420-M906.htm?Castrol%20Motor%20Oil%20%28API%20SJ%2FCF%29%2C%20TWS%20Motorsport%2C%2010W-60%20Full%20Synthetic%20%281%20liter%29 Topic: M44 Head Gasket on M42? (Read 12452 times)