Author Topic: Replacing Hood Liner/Insulation  (Read 9932 times)

Brian318is

  • Jr. Member
  • **
  • Thank You
  • -Receive: 1
  • Posts: 89
    • View Profile
Replacing Hood Liner/Insulation
« on: November 22, 2010, 09:37:07 AM »
Total Time: 45 minutes-1 hour.

By now, the foam insulation under our hoods have gone to hell. For me, it was irritating because it was rapidly coming apart, and making a mess of my engine bay. It's not a minty engine bay, but the brown foam everywhere was annoying. So, I decided to change the foam.

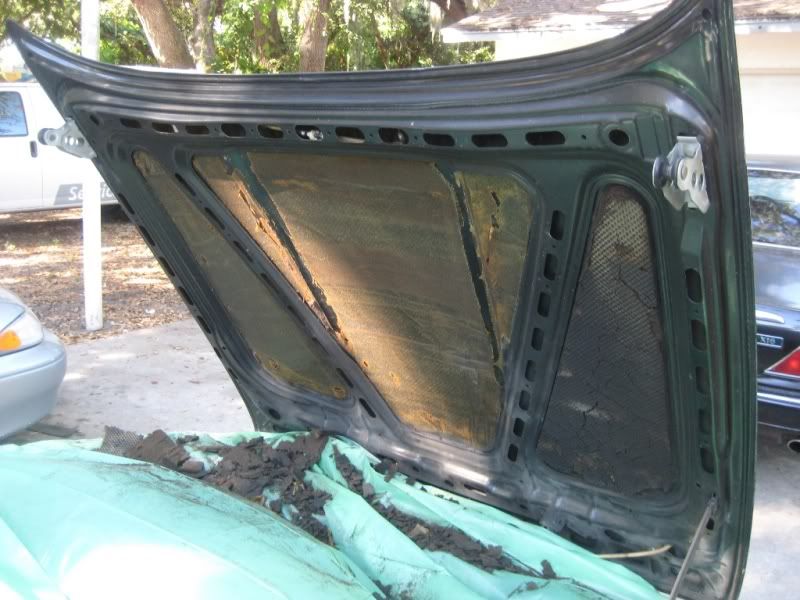
Odds are, your insulation looks something like this. (On the right.. already scraped the other 2 sections.)


What you will need:
Hood Insulation (51-48-1-972-245-M89) about $30 from Pelican.
Sanding Block
Plastic Scraper (I got mine in the paint section at Lowes/Home Depot for ~2 dollars. I chose plastic because it is easily bent.)
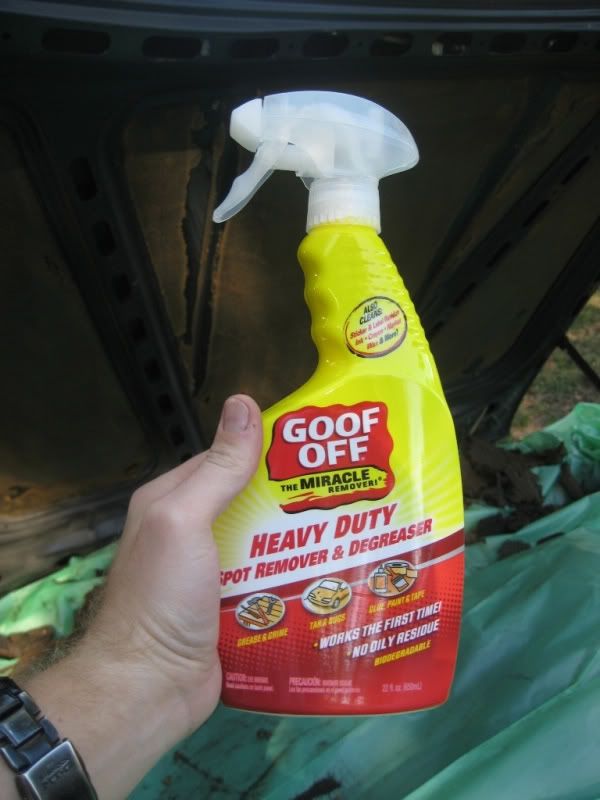
Goo-Off or some kind of old glue remover. Goo-Off did not work the best, but you're welcome to try.
Plastic Drop Cloth (Or some kind of sheet to protect the bay, or just remove the hood.)
Eye protection. I started off with no eye pro, and by the end I had my glasses on, and foam in my eye.

Step 1 -
 
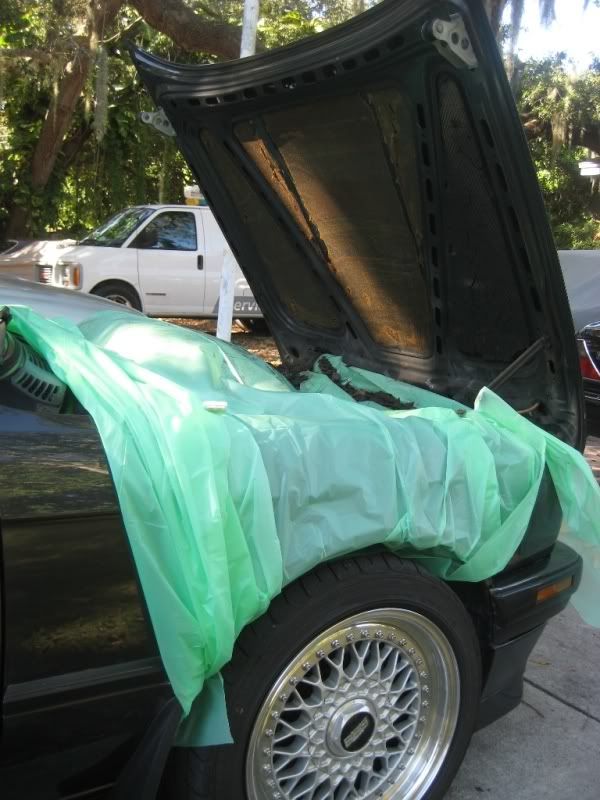
Place drop cloth over engine bay so as not to get the foam everywhere. Once you start scraping this stuff, it disintegrates and flies everywhere. I also suggest eye protection of some sort, because the stuff will get in your eyes.

Step 2 -

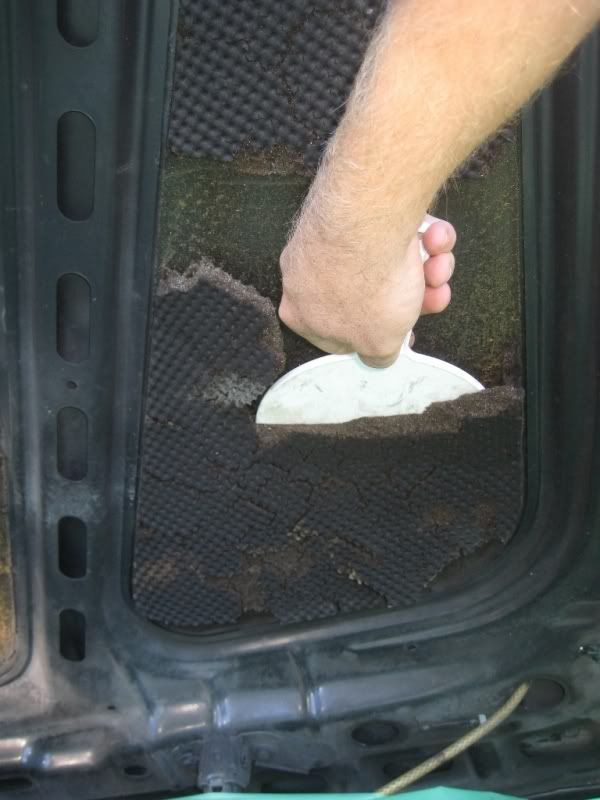
Start Scraping. The foam itself comes off very easily, but the glue is the tough part. Just get as much foam off with the scraped as you can, and you can go back and work on the glue.

Step 3 -

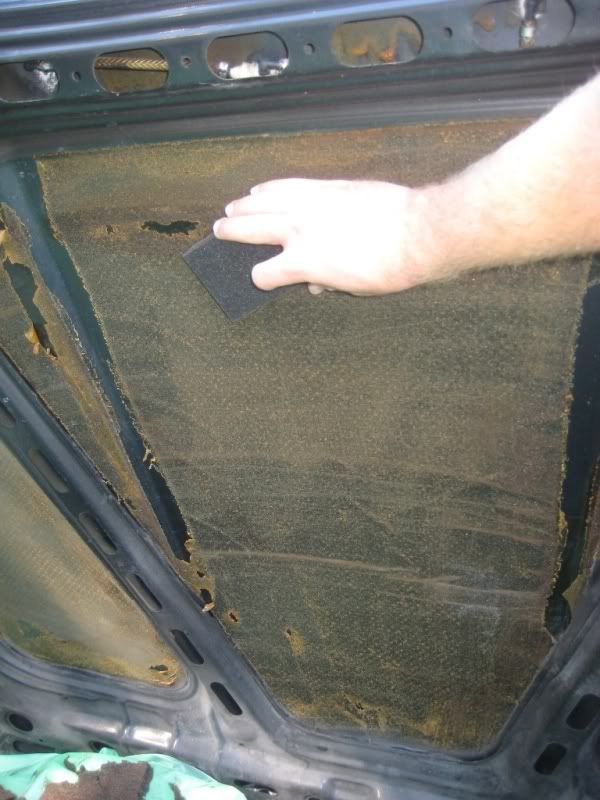
Once all the foam is off, use the sanding block to really break up what's left of the foam on the surface of the hood. The glue was not sticky or even coming off at this point, it was more of a brown stain on my hood, but still felt "tacky." Spend some time with the sanding, as this will get most of the remainder of the foam and create a better surface area for the "goo off" to work.

Step 4 -

Once you are satisfied with your sanding, use "Goo-Off" or some kind of glue remover/solvent to try and remove the remainder of the glue off of the hood. Remember that some solvents may strip your paint, so be careful as not to get any on the exterior of your car. The Goo-Off had no effect on my paint, but.. it was not very effective at getting the glue off either. Apply your solvent in copious amounts, and let sit for 5-10 minutes to soak in.

Step 5 - No picture, but self explanatory. Go back with the scraper and try and scrape the glue. It may not come off as well as you want, but just keep working at it. I scraped, sanded, scraped, sanded, scraped and then used a wet rag to wipe all of the little "glue chunks" that came off of the hood. It still looked like a brown stain, but it was good enough to stick the new insulation to.

Step 6 - Do your best to remove any extra solvent. Use a wet rag and then allow time for it to dry.. you don't want to stick your new hood liner to a wet, solventy surface.

Step 7 - Apply your new hood liner. It is pretty much like a sticker, just remove the backing and stick to your hood. The glue on the new liner is VERY sticky and tacky, but wasn't too ridiculous to work with. Just make sure to grip the liner by the foam and not the back, and you won't have any problems. I glued from the top down, and it took me less than 5 minutes to do all 3 panels by myself.. I would suggest having a friend to do a really GREAT job.

Step 8 -

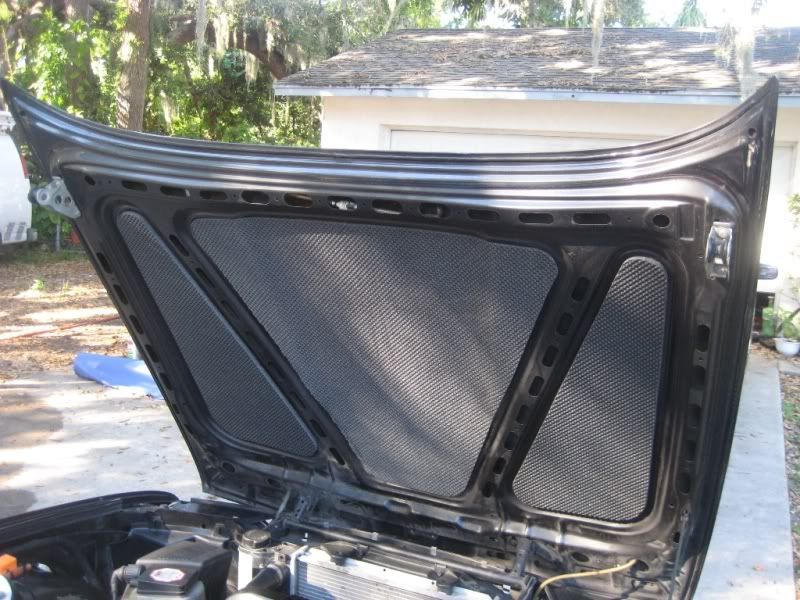
Admire the fruits of your labor.


I love the look of the new headliner. Looks and feels completely OEM, and no more foam flying around my engine bay.

Hope you enjoyed this impromptu DIY, good luck.

Brian318is

  • Jr. Member
  • **
  • Thank You
  • -Receive: 1
  • Posts: 89
    • View Profile
Replacing Hood Liner/Insulation
« Reply #1 on: November 22, 2010, 09:46:26 AM »
The pics should rotate eventually.. photobucket is being very fickle right now.

YetiX

  • Full Member
  • ***
  • Thank You
  • -Receive: 0
  • Posts: 138
    • View Profile
Replacing Hood Liner/Insulation
« Reply #2 on: November 22, 2010, 11:05:12 AM »
Very timely, I just ordered a set of insulation for my car!

I have also heard you can use the high-pressure function at a coin car-wash and just blast the shit off, but I think that might create even more of a mess than your way.
-Scott-
\'91 318i 5spd

Brian318is

  • Jr. Member
  • **
  • Thank You
  • -Receive: 1
  • Posts: 89
    • View Profile
Replacing Hood Liner/Insulation
« Reply #3 on: November 22, 2010, 01:22:36 PM »
It would have to be pretty high-pressure to get the stuff off.. it's been baking for over 20 years, and I live in Florida.. so it's getting it from both sides of the hood.

DesktopDave

  • Administrator
  • Legendary
  • *****
  • Thank You
  • -Receive: 60
  • Posts: 5076
  • Lives in the 80s
    • View Profile
    • The Iconic BMW
Replacing Hood Liner/Insulation
« Reply #4 on: November 22, 2010, 06:07:28 PM »
That looks really good.  I went with a six-cylinder hood cover instead.  Sure it rubs on the air cleaner & intake manifold a bit, but it's a lot easier to install and helps quiet down all that chain drive rattle.
'08 Karmesinrot 128i 6MT
'86 Zinnoberrot 635CSi (M30B32/G265/3.46 torsen LSD)

Sold: '97 Montrealblau 318iS, '91 Brilliantrot 318i, '91 Brilliantrot 318iS

YetiX

  • Full Member
  • ***
  • Thank You
  • -Receive: 0
  • Posts: 138
    • View Profile
Replacing Hood Liner/Insulation
« Reply #5 on: November 23, 2010, 10:03:34 AM »
Quote from: DesktopDave;98892
That looks really good.  I went with a six-cylinder hood cover instead.  Sure it rubs on the air cleaner & intake manifold a bit, but it's a lot easier to install and helps quiet down all that chain drive rattle.

I want one of those but can't seem to find one anywhere. So I just ordered new insulation.
-Scott-
\'91 318i 5spd

Brian318is

  • Jr. Member
  • **
  • Thank You
  • -Receive: 1
  • Posts: 89
    • View Profile
Replacing Hood Liner/Insulation
« Reply #6 on: November 23, 2010, 12:36:41 PM »
I just don't like the look of the hood cover.. it looks kind of bulky.

e30Andym42

  • Full Member
  • ***
  • Thank You
  • -Receive: 0
  • Posts: 247
    • View Profile
Replacing Hood Liner/Insulation
« Reply #7 on: November 24, 2010, 04:11:15 PM »
Great writeup.  Wish I had the time to do this.  My engine bay looks like shit because of this stuff.  One day... :D
Proud owner of "A very cute car" :cool:

[SIGPIC][/SIGPIC]

"Objects in mirror are slow"

DesktopDave

  • Administrator
  • Legendary
  • *****
  • Thank You
  • -Receive: 60
  • Posts: 5076
  • Lives in the 80s
    • View Profile
    • The Iconic BMW
Replacing Hood Liner/Insulation
« Reply #8 on: November 24, 2010, 06:43:41 PM »
Quote from: Brian318is;98917
I just don't like the look of the hood cover.. it looks kind of bulky.

You're right about that...it really is bulky.  Surprisingly it doesn't weigh much at all.  Don't install one on a windy day, and certainly don't install one if you have a painted manifold...
'08 Karmesinrot 128i 6MT
'86 Zinnoberrot 635CSi (M30B32/G265/3.46 torsen LSD)

Sold: '97 Montrealblau 318iS, '91 Brilliantrot 318i, '91 Brilliantrot 318iS

Gerta318is

  • Sr. Member
  • ****
  • Thank You
  • -Receive: 2
  • Posts: 296
    • View Profile
Replacing Hood Liner/Insulation
« Reply #9 on: November 26, 2010, 11:37:55 PM »
I did this last summer ... It really helps!  I did also score a late model cover with all the rivets to keep it in place.  It really helps make the car's engine bay a lot nicer.  I'm glad I plan on cleaning up the valve cover and manifold including painting them a nice shade of black.

2002Harv

  • Newbie
  • *
  • Thank You
  • -Receive: 0
  • Posts: 41
    • View Profile
Replacing Hood Liner/Insulation
« Reply #10 on: December 13, 2010, 08:43:46 PM »
GOOF-Off

John

bad_robot

  • Newbie
  • *
  • Thank You
  • -Receive: 1
  • Posts: 18
    • View Profile
Replacing Hood Liner/Insulation
« Reply #11 on: January 23, 2011, 07:47:06 PM »
I did this but I used some foam that has an shiny aluminum covering on one side. I used silicone sealant (on the rubber side) to glue it on.